Dr. Lamperti discusses what to do if you have a Family Guy worthy, Peter Griffin-esque, deep cleft chin. He reviews the treatment options and goes over a case study of one of his own patients.
When it comes to chin surgery many people  focus on how to make the chin bigger via chin implantation or sliding genioplasty surgery. An equally important thing to consider is how to reduce an overly prominent chin.
Within this category of chin surgery procedures is how to treat an excessive, deep chin cleft. This so-called "Butt Chin" tends to be a masculinizing feature which many people, especially women, want to treat.
What causes a cleft chin?
Before going into how to correct an excessive chin cleft let's first discuss what causes a chin cleft in the first place.
Many people assume that a cleft chin is related to how the chin bone looks. The schematic below shows what the chin bone typically looks like.
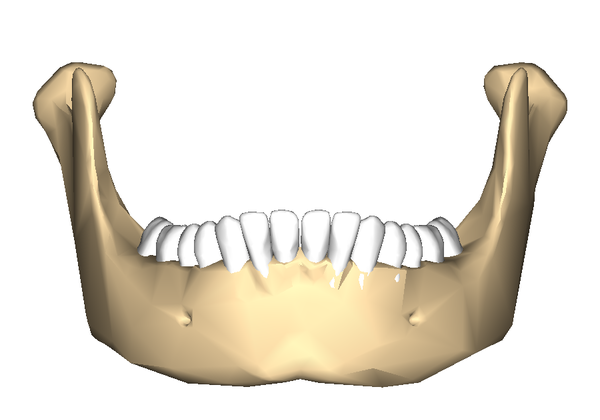
A chin with a prominent cleft is thought to have a deep groove in the middle of the chin bone. It turns out that the chin bone often does have prominent tubercles on either side, but this isn't the major factor when it comes to having a cleft chin.
In actuality the main cause of chin clefting is the way in which the overlying chin muscle (mentalis muscle) is situated under the skin of the chin.
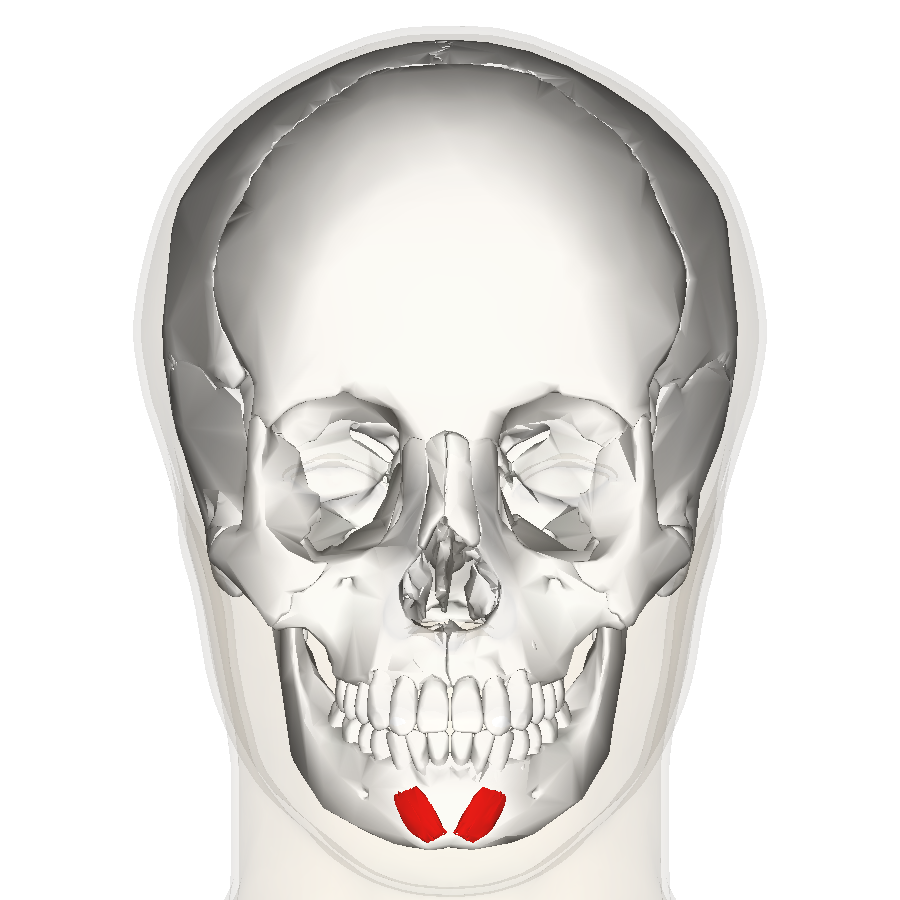
People with deep chin clefts have either a wide space between both mentalis muscles and/or very thick mentalis muscles which create a relative valley between the muscles.
Based on this knowledge of chin clefting you can see how merely shaving down the chin bone is unlikely to create the desired improvement in chin cleft effacement. To properly improve the appearance of a deep cleft chin surgeons must address the relationship of the soft tissue overlying the chin bone.
How to correct a prominent cleft chin
There are a few ways to improve the appearance of a deep cleft chin. One of the most straight forward methods is to use an injectible soft tissue filler to fill in the chin cleft. This can be done in the office and takes just a few minutes. Fillers such as Radiesse, Restylane, or Juvederm can be used. One down side to this method is that the filler isn't permanent so would have to repeated. The fillers tend to last six to twelve months in this area.
More permanent treatment options include modifying the chin bone itself or treating the separation of the chin muscles.
An important thing to consider is that it is very difficult to completely reverse a very prominent chin cleft using surgery alone. This is due to the fact that we must avoid distorting the chin when modifying the chin muscles. As such surgeons are limited in how much they can move the chin muscles toward the midline.
Deep Cleft Chin Case Study
To better examine how to improve the appearance of a prominent chin cleft let's look at one of my actual patients to see what was done to improve the appearance of her chin.
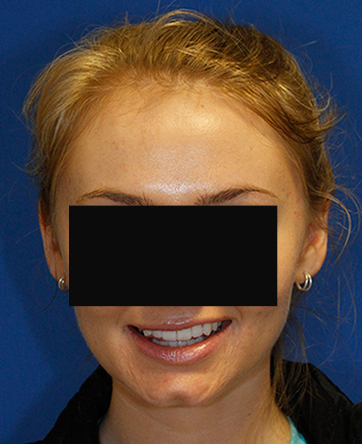
The lovely young woman shown above had been bothered for years by her prominent cleft chin. She'd had been teased, called names such as "Butt Chin" and was even told that she had the same chin as Peter Griffin, the dad from "The Family Guy".
You can see how this woman's chin does have a significantly deep cleft.
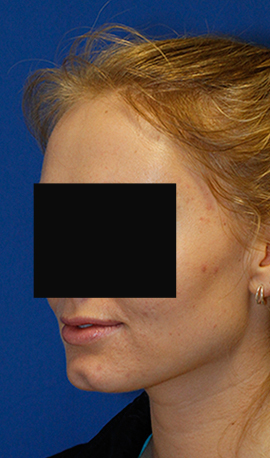
During her exam I could feel that she had mildly prominent bony tuburcles making up her chin bone. However, I could tell that the majority of the issue was related to her chin muscles.
In discussing the options with the patient it was clear that she wanted a more permanent, surgical solution to her problem.
To correct her chin cleft prominence we formulated a multi-tiered plan.
The first step involved making an incision inside the mouth to gain access to the chin bone. I was able to confirm that the chin bone was somewhat wide and had some lateral prominence. I used a drill to sand down and reshape the chin bone. I focused on narrowing the chin defining points themselves in order to create a narrower, more feminine chin.
The next step in the plan was to free up the paired mentalis chin muscles from the surrounding soft tissue. I needed to release the muscles so that I could bring them more into the midline to fill up the deep chin crease.
Once the muscles were released I then moved onto the process of harvesting additional soft tissue to graft into the center of the chin to help fill in the area further. As I had discussed with the patient before surgery I made an incision in the hairline behind her right ear.
I then harvested some of the underlying fascia and soft tissue from the area to then place in the chin region. The graft was placed between the mentalis muscles and dissolvable sutures were used to sew the muscles to each other and bring them toward the midline.
The soft tissue graft was placed between the muscles to fill in the chin cleft further.
The chin and post-auricular incisions were then closed using several layers of dissolvable sutures.
Cleft Chin Removal Before and After Photos
So what kind of results does this multi-step procedure lead to? Let's look at some before and after photos to see how I was able to significantly reduce the patient's deep cleft.
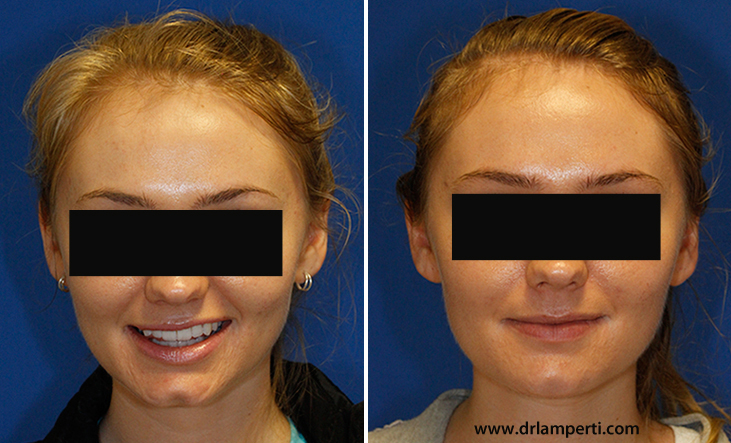
In the photos above you can see how the very deep midline chin cleft has now been effaced such that there is only a subtle shadowing. The overall effect is that our eyes are no longer drawn to the chin area. Additionally, you can see how the formerly broad chin now has a more feminine taper.
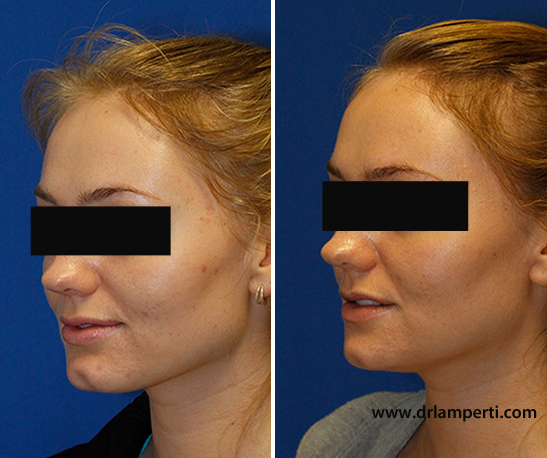
These oblique photos further demonstrate the improved chin contour and improved tapering.


